
A Quick And Simple Collage DIY Project with Gorilla Spray Adhesive
We have A LOT of pictures displayed in our home….and I love them! I didn’t want to clear them out; but I was in need of major de-cluttering.
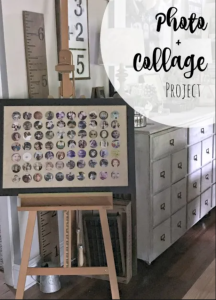
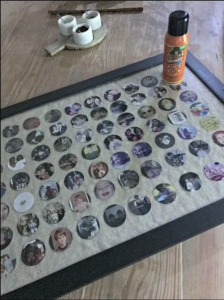
I cleared out over 70 frames with this circle photograph collage project! And still get to display my pics!
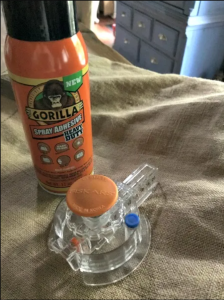
I used Gorilla Spray Adhesive to attach the burlap to the pasteboard and the pictures to the burlap because it’s repositionable for up to 10 minutes, dries clear, and is photo safe. Once dried….it forms a permanent bond to wood, metal, fabric, foam, paper, glass, leather, and more. [You can also use it on plastic….just not vinyl materials, automotive headliners, polypropylene, polyethylene or similar materials.]. So as you can see Gorilla Spray Adhesive is the perfect glue for this project with its heavy duty adhesive that form a permanent and clear bond.
So what are you waiting for join us as we create this wonderful yet simple project.
Here’s what you need:
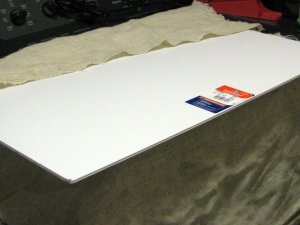
- 1 – 24 x 36 posterboard
- 1.5 yards of burlap
- Scrapbooking circle cutter
- Gorilla Spray Adhesive
- 1 – 24 x 36 poster frame of your style of choice
Here’s How to Do It:
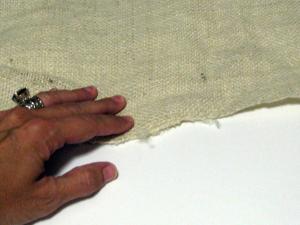
First cover the 24 x 36 posterboard with burlap by cutting it about 4 inches bigger all the way around. Pull one side around and Gorilla Spray Adhesive and attach. Pull the opposite side over tightly and attach with adhesive. When you get to the the last two sides wrap them as if you are wrapping presents and attach with adhesive. Be sure to hold in place for a few minutes as the glue dries.
The drying step is important it make sure to give Gorilla Spray Adhesive time to properly form a bond with the surface. When the Gorilla Spray Adhesive finish bonding you won’t ever have to worry about it breaking or being loosed.
Be sure to wrap the burlap around the posterboard tightly…..but not so tight that it bends the board.
It doesn’t take a lot of the spray to attach the material due to the heavy duty adhesive of the Gorilla Spray Adhesive, so please don’t overdo it. =)
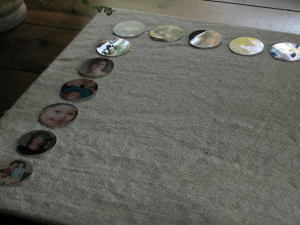
Use a scrapbooking circle cutter to cut 2″ circles of as many pictures that would fit into that circumference. You can choose to cut your circles larger…..3″ or 4″, it just means less pictures will fit onto the board. I chose 2″ circles and was able to get 70 pictures onto the board! Woohoo!
Then use Gorilla Spray Adhesive to attach them in rows onto the board.
Then frame the board in a ready-made poster frame!
Voila! Pictures still out to be enjoyed—70 less frames sitting on tables.
This autumn has really been all about clearing out clutter—and having a fresh and clean home this year. I’m excited about starting the holiday season with fresh, cleared out spaces. Easy DIY projects like this one make a really big difference when trying to clear out spaces and still keep out what is important to you.
What projects are you working on in your home to get ready for the holidays ahead? Make sure to share with us. :))