Easy and Quick DIY with Gorilla Clear Grip
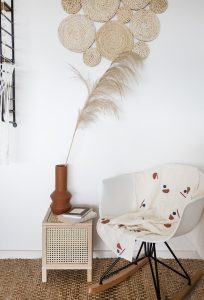
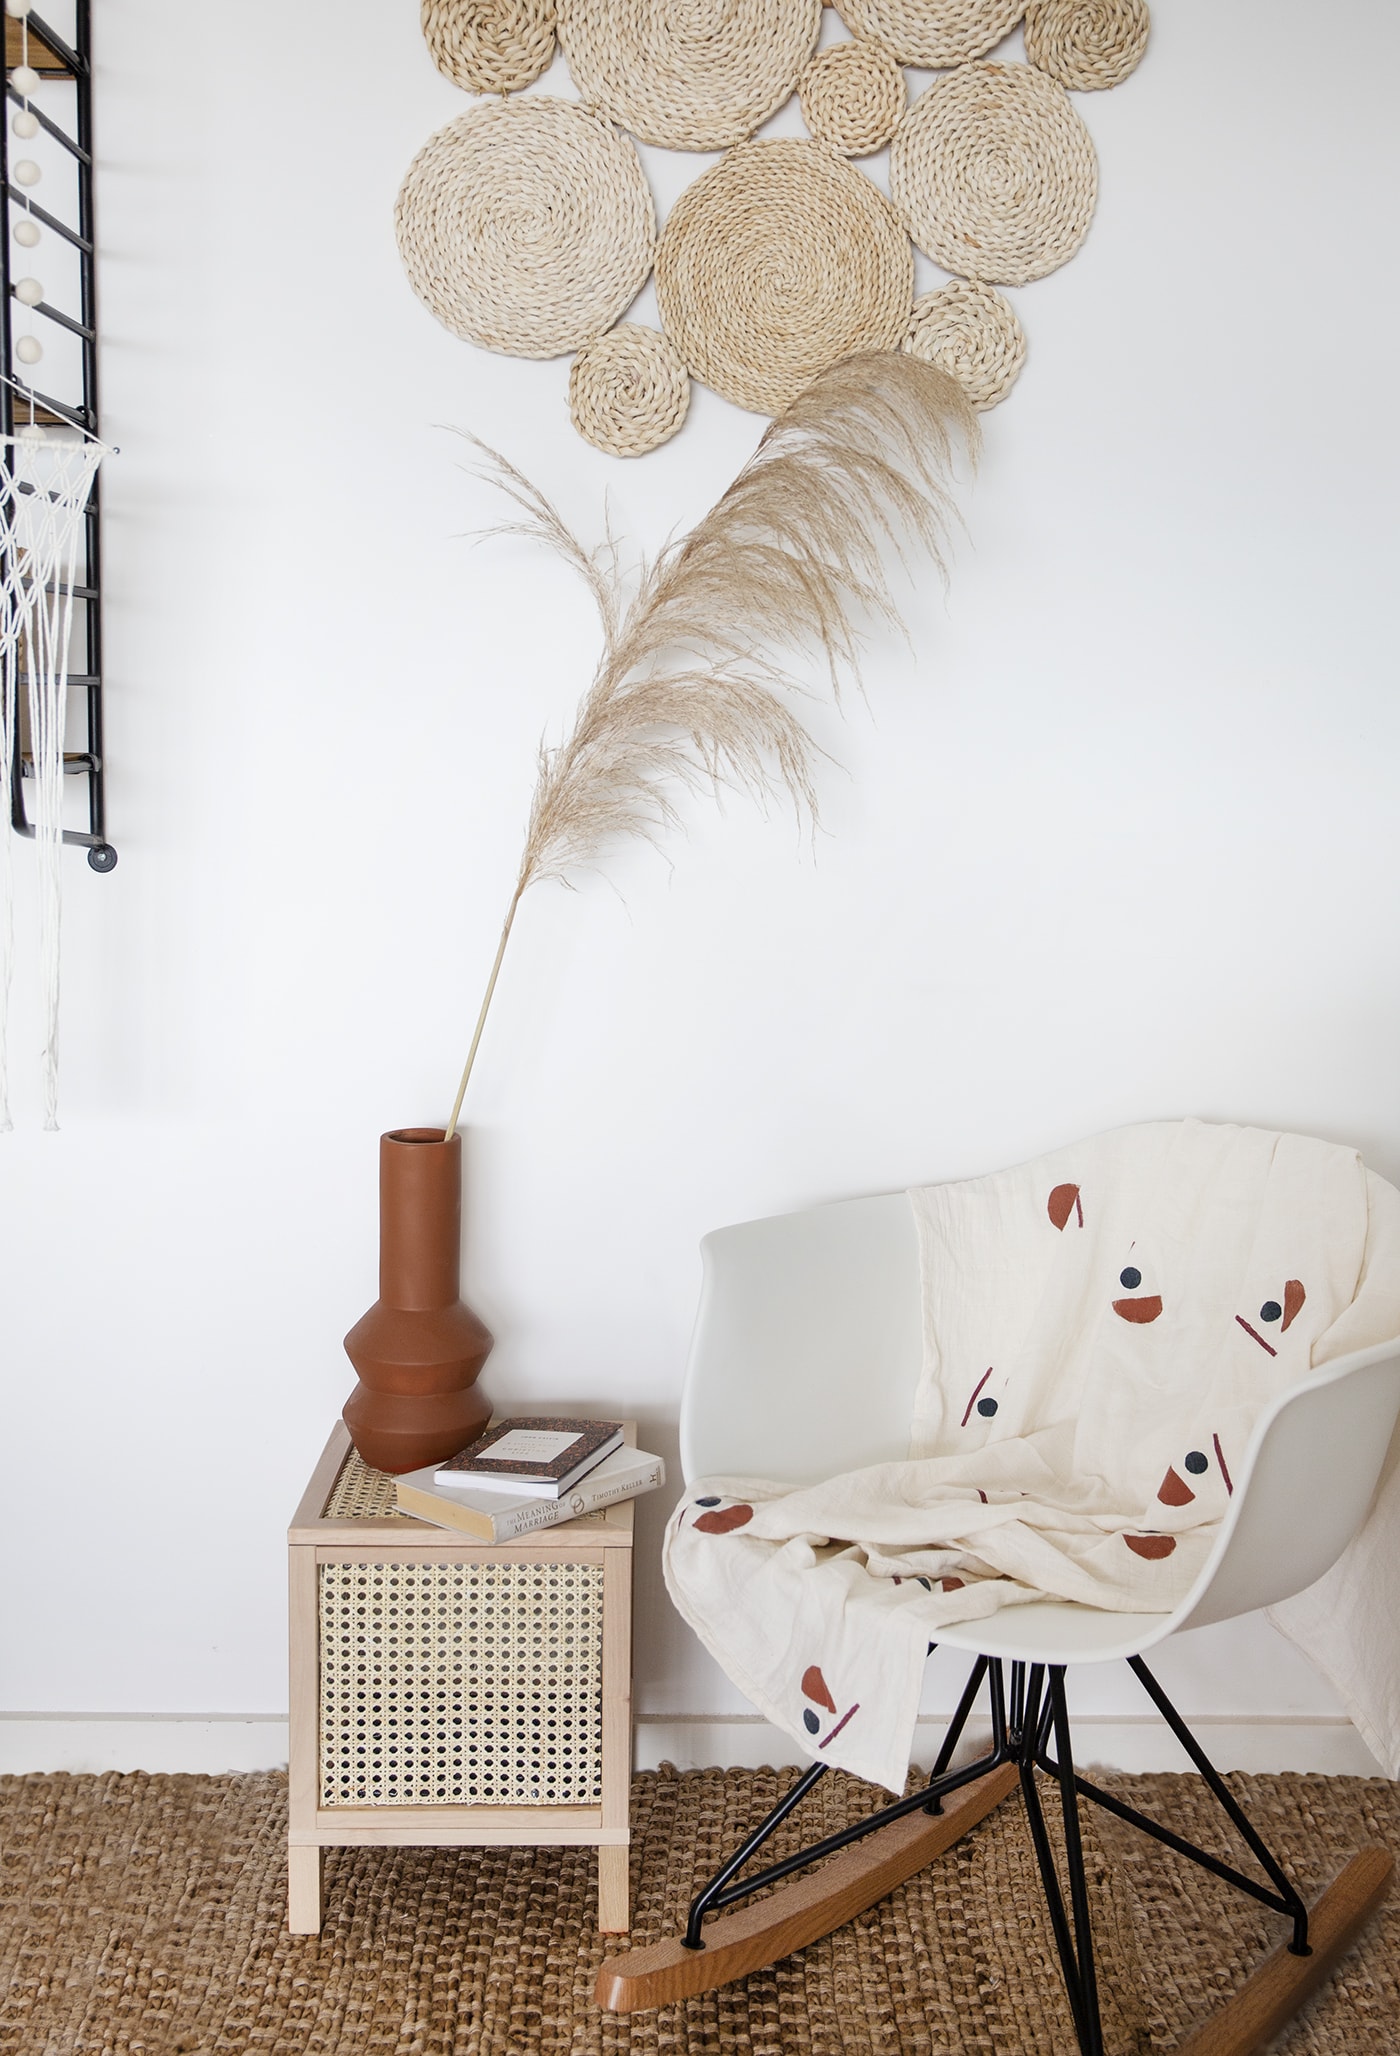
I don’t know about you but I’ve spent the last year becoming more and more of a rattan lover! It’s seeping into every area of our home and I’m not even willing to apologise for the overload. As with anything ‘on trend’ it can be very expensive to buy into so I thought I’d show you a really simple and inexpensive way to get the look yourself. With a new term beginning and ‘back to school’ on the brain this DIY project is perfect for storing books and stationery that usually get dumped around the house, all concealed in a pretty box that can also be used as a side table. I do love a multi purpose make!
I’ve once again teamed up with Gorilla Glue to make this project even more straightforward, incorporating two of their impressively hardwearing products…because it’s amazing what you can make with glue!
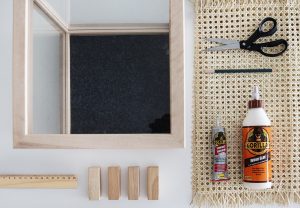
MATERIALS
- Ikea glass display box or similar
- Gorilla Clear Grip
- Gorilla Wood Glue
- Cane webbing sheets x 2 (depending on the space you wish to fill)
- Wooden rectangular blocks (these were from a kids toy block set)
- Scissors
- Pencil
- Ruler
- Sheet of paper
- Protection for surfaces underneath
- A clamp for best results
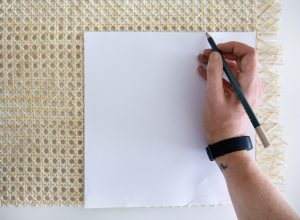
Start by measuring the outer glass panels of your box to create a paper template for the cane webbing. Draw around the template onto the webbing sheet and cut out with scissors. Repeat for each side of the cube that will be on display.
Clean the glass surfaces, making sure there’s no dirt. Using the Gorilla Clear Grip, trace around the outer edge of one of the glass panels and then add a diagonal glue line cross through the centre. The glue will dry clear but try and do this step neatly. Add some dots of glue to the back of the cane webbing sheet too for extra joining power.
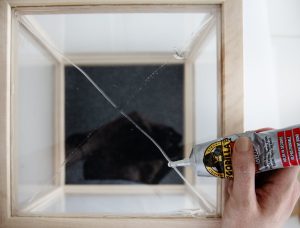
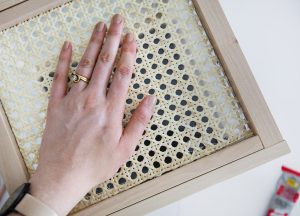
Wait approximately 2 minutes for the glue to partially dry and then place on your pre-cut cane webbing sheet and press into place. You can use your paper template placed on top, along with something heavy to hold in place while it dries. Once dry repeat steps 2 & 3 on each glass panel.
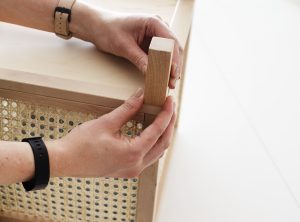
Now turn the box over so the bottom is facing up. Remove the clear applicator tip from the Gorilla Wood Glue bottle to clean out the glue build up and shake vigorously to restore to original consistency. Add the Gorilla Wood Glue fairly generously to one of the bottom corners as well as the joining edge of one of your wooden blocks.
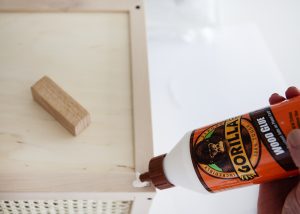
Rub together with the other surface to distribute the glue evenly on both surfaces and hold the block down on the bottom of the box to position. Then use a clamp to hold in place whilst the Gorilla Wood Glue dried (for between 20-30 mins). In terms of pressure, apply enough that will cause a fine bead of glue to squeeze out when the proper pressure is applied. Repeat for each, allowing 20-30 mins clamping time for each but leave overnight before use, to allow for full curing.
And that’s a wrap! A perfect way to introduce some stylish rattan into your home with a dual purpose in the form of hidden storage. Gorilla glues make the project easy peasy and eliminate the need for heavy duty tools.
